Essential Micropipetting Techniques: Mastering the First and Second Stops for Perfect Liquid Dispensing
The accuracy and reliability of laboratory results largely depend on proper pipetting technique. Whether working with routine samples or challenging liquids, understanding the mechanics of micropipettes—particularly the crucial first and second stops—is fundamental to achieving consistent, accurate results. This article provides comprehensive guidance on micropipetting techniques, focusing on proper dispensing methods and contamination prevention strategies.
Understanding Micropipette Mechanics
The Two-Stop System Explained
The plunger of a micropipette has two distinct stopping points that serve different purposes:
- First stop: This is the initial resistance you feel when depressing the plunger. The distance to this first stop is calibrated to correspond exactly to the set volume of liquid.
- Second stop: This requires additional force to reach beyond the first stop. The second stop is designed to expel any remaining liquid from the tip, ensuring complete dispensing.
Understanding these two stops is crucial for proper liquid handling and forms the basis of different pipetting techniques.
Basic Pipetting Modes
Two fundamental pipetting modes utilize the stops differently:
Forward (Standard) Pipetting
-
Depress the plunger to the first stop
-
Immerse the tip into the liquid
-
Release the plunger slowly to aspirate liquid
-
Remove the pipette from the liquid
-
Depress the plunger to the first stop to dispense most of the liquid
-
Continue to the second stop to expel any remaining liquid
Forward pipetting yields better accuracy and precision for most standard liquids and is the recommended technique for routine laboratory work.
Reverse Pipetting
-
Depress the plunger all the way to the second stop
-
Immerse the tip into the liquid
-
Release the plunger to aspirate liquid (this includes extra volume)
-
Remove the pipette from the liquid
-
Dispense by pressing the plunger only to the first stop
-
The excess liquid remains in the tip and is discarded
According to research, reverse pipetting has significant benefits when pipetting volatile or viscous liquids as it helps prevent dripping and ensures more consistent dispensing.
Step-by-Step Guide to Perfect Pipetting
Preparing Your Micropipette
Proper preparation is essential for accurate pipetting:
-
Select a high-quality pipette with your intended volume in the middle to upper range of the pipette’s capacity
-
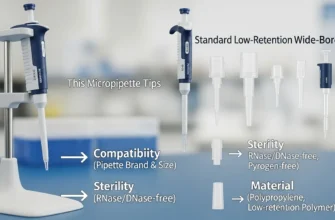
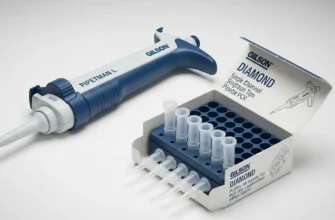
Ensure the pipette tips are compatible with your specific pipette model
-
Check that the pipette has been recently calibrated
-
Hold the pipette loosely and utilize the finger rest to reduce hand fatigue
Aspirating Liquid Correctly
The aspiration step is critical for accurate volume measurement:
-
Hold the pipette vertically when aspirating
-
Depress the plunger to the first stop before entering the liquid
-
Immerse the tip 2-3 mm below the liquid surface (deeper immersion can lead to inaccuracy)
-
Release the plunger slowly and consistently to draw up liquid
-
Pause for 1 second after aspiration before removing from liquid
-
Pull the pipette straight up from the center of the liquid
Research shows inaccuracy can increase three to five times by immersing too deeply while holding the pipette at an angle.
Dispensing Liquid Perfectly
This is where understanding the first and second stops becomes crucial:
-
Position the micropipette at a 45-degree angle against the wall of the receiving container
-
Press the plunger to the first stop at a consistent speed
-
Pause briefly
-
Continue to the second stop to expel any remaining liquid (for forward pipetting)
-
While maintaining pressure at the second stop, withdraw the tip from the liquid
-
Release the plunger once the tip is completely removed
For removing the final droplet, touch the tip to the side wall of the receiving container—surface tension will help draw remaining liquid out of the tip.
Advanced Techniques for Challenging Liquids
Handling Viscous Liquids
Viscous solutions like glycerol, DMSO, and Tween 20 require special handling:
-
Use reverse pipetting technique
-
Consider using wide bore tips when available
-
Pipette slowly—keep the tip in the solution for 2-3 seconds after aspiration and dispensing
-
For glycerol, use a pipetting speed of about 300 μL/sec
-
For DMSO, use low-retention tips and a pipetting speed of about 450 μL/sec
Working with Volatile Liquids
Volatile liquids such as ethanol, acetone, or acetonitrile present unique challenges:
-
Pre-wet the tip extensively (5-10 cycles) to saturate the air column and reduce evaporation
-
Use reverse pipetting to prevent dripping caused by high vapor pressure
-
Work quickly to minimize evaporation
-
Consider using filtered tips to prevent chemical damage to the pipette
Research demonstrates that proper pre-wetting and reverse pipetting can dramatically improve accuracy when handling volatile liquids like acetonitrile.
Mastering Small Volumes
For volumes below 10 μL:
-
Hold the pipette completely vertical during aspiration
-
Consider diluting samples to work with larger volumes
-
Instead of pipetting 1 μL, dilute and pipette 6 μL for better accuracy
-
Use reverse pipetting for improved consistency
-
Ensure temperature equilibrium between pipette, tip, and liquid
As one researcher noted: “The accuracy of pipetting 6 μL is infinitely higher than the accuracy of pipetting 1 μL”.
Essential Tips to Improve Accuracy and Precision
Pre-wetting the Pipette Tip
This simple step significantly improves accuracy:
-
Aspirate and fully expel the liquid at least 3 times before aspirating for delivery
-
For volatile liquids, increase to 5-10 pre-wetting cycles
-
Pre-wetting increases humidity within the tip, reducing evaporation and ensuring accurate volume delivery
According to experts, “When neglecting the pre-wetting procedure, the first few dispenses tend to deliver less volume due to evaporation”.
Consistent Angle and Immersion Depth
Proper positioning makes a significant difference:
-
Hold the pipette vertically during aspiration
-
Immerse the tip to consistent depth (2-3 mm is optimal)
-
Dispense at a 45-degree angle against the vessel wall
-
Avoid touching the bottom of the container with the tip, which may restrict aspiration
Proper Pause Times
Timing affects accuracy:
-
Pause consistently for one second after aspirating
-
For viscous liquids, increase the pause to 2-3 seconds
-
Consistent pausing balances continued flow and evaporation effects
Preventing Contamination in Pipetting
Types of Contamination and Their Prevention
There are three main types of contamination in pipetting:
-
Pipette-to-sample contamination: Prevent by using certified pure tips appropriate for your application
-
Sample-to-pipette contamination: Prevent by using filter tips
-
Sample-to-sample contamination: Prevent by changing tips between samples and having proper workflow systems
Using Filter Tips Effectively
Filter tips provide an essential barrier:
-
Use filter tips to prevent aerosol transfer from the sample into the pipette body
-
Essential when handling:
-
DNA/RNA samples to prevent PCR contamination
-
Radio-labeled or corrosive samples
-
Infectious materials
-
As noted by an expert: “Every time you aspirate liquid, aerosols are generated inside the pipette tip. If you don’t use filter tips, these aerosols may contaminate your pipette and, consequently, your next samples”.
Tip Changing Best Practices
Establish consistent protocols:
-
Always change tips between different samples
-
For qPCR applications, use triplicates rather than duplicates for reliable results
-
When pipetting multiple reagents, add them in an order that minimizes contamination risk
-
Have a system to avoid pipetting in the same well twice
Common Pipetting Errors and Their Solutions
Technical Errors
-
Inconsistent pipetting rhythm: Maintain the same speed and technique for each operation
-
Creating bubbles: Dispense slowly and at an angle against the vessel wall
-
Aspirating too quickly: This creates inaccurate volumes and potential for bubbles
Procedural Errors
-
Neglecting pre-wetting: Always pre-wet for better accuracy
-
Using the wrong pipetting mode: Match your technique to your liquid
-
Improper tip selection: Ensure tips are compatible with your pipette
-
Skipping maintenance: Regular calibration is essential for accuracy
As one expert noted: “Regular maintenance and calibration, particularly to ISO 8655, allows for optimal results”.
Conclusion
Mastering proper pipetting technique, particularly understanding and correctly using the first and second stops of your micropipette, is essential for accurate and reliable laboratory work. By following the guidelines outlined in this article, you can significantly improve your pipetting accuracy, reduce contamination risks, and ultimately enhance the quality of your experimental results.
Remember that good technique comes with practice and attention to detail. While it may seem tempting to take shortcuts, particularly when facing heavy workloads, slowing down and focusing on proper technique will save time in the long run by preventing errors and the need to repeat experiments. Regular maintenance and calibration of your pipettes will further ensure consistent performance and reliable results in all your laboratory applications.


