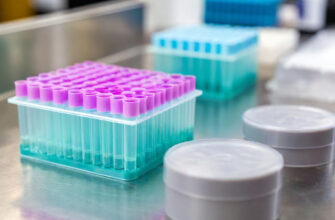
In the meticulous world of scientific research, where a single contaminant can invalidate weeks of work, sterility is not a preference—it’s a prerequisite. The global laboratory environment relies on a vast array of sterile equipment, contributing to a global lab consumables market projected to reach USD 20.51 billion by 2029. Central to this are pipette tips, the workhorses of liquid handling, and their often-overlooked guardians: the plastic pipette boxes. These containers are more than simple storage; they are critical components in maintaining a sterile workflow, especially in sensitive applications like cell culture. Ensuring these boxes are properly sterilized is a fundamental aspect of lab safety and data integrity. This guide provides a comprehensive overview of the protocols, temperatures, and best practices for autoclaving plastic pipette boxes, transforming them into reliable assets in the pursuit of reproducible science.
The Unseen Hero of Laboratory Sterility
The Critical Role of Sterilization in the Laboratory
Sterilization is the process of completely eliminating or destroying all forms of microbial life, including bacteria, viruses, fungi, and spores. In laboratory settings, this is non-negotiable. It prevents cross-contamination between experiments, protects the integrity of sterile media and reagents, and ensures the safety of personnel working with potentially biohazardous material. For pipette boxes, effective sterilization means that the sterile environment they provide for fresh-from-the-autoclave pipette tips is uncompromised, safeguarding every subsequent step of an experiment.
The Science Behind Steam Sterilization: How Autoclaves Work
 How an autoclave uses high-pressure, high-temperature steam to sterilize pipette tip boxes. The inset shows the impact of steam on a microbial cell.
Understanding the Autoclave Principle
An autoclave is essentially a highly specialized pressure chamber that uses high-pressure, high-temperature steam to kill microorganisms. It operates on the principle that the boiling point of water increases under pressure. By creating a high-pressure environment, the autoclave can achieve steam temperatures far above 100°C (212°F). This high-temperature steam is a potent sterilizing agent because it rapidly denatures and coagulates essential proteins and enzymes within microbial cells, rendering them non-functional and leading to cell death. The growing reliance on this technology is reflected in the autoclave market, which is projected to reach $3.1 billion by 2028.
Key Parameters for Guaranteed Sterility
Effective sterilization in an autoclave depends on the precise control of three key parameters: temperature, pressure, and time. The saturated high-temperature steam must contact all surfaces of the items being sterilized for a specified duration to ensure complete microbial kill. The most common autoclave temperature for sterilizing laboratory equipment is 121°C (250°F), maintained at a pressure of 15 pounds per square inch (psi) for a minimum of 15-30 minutes. The exact time depends on the size and density of the load, as effective steam penetration is crucial.
Material Compatibility: What Can (and Cannot) Be Autoclaved Safely
The Gold Standard: Autoclavable Plastics (Polypropylene Deep Dive)
Not all plastics are created equal when it comes to withstanding the harsh conditions of an autoclave. The most common and reliable autoclavable plastic for labware, including pipette boxes, is Polypropylene (PP). Its high melting point (around 160°C) and robust chemical resistance allow it to endure repeated sterilization cycles at 121°C without melting, warping, or significant degradation. Always look for the “PP” recycling symbol or manufacturer specifications confirming autoclavability before processing.
Glassware: Choosing the Right Type for Sterilization
While the focus is on plastic, it’s useful to compare it with glassware. Only certain types of glass can be safely autoclaved. Borosilicate glassware (e.g., Pyrex® or Kimax®) is the standard for laboratory settings due to its high thermal shock resistance. It can withstand the rapid temperature changes of an autoclave cycle without shattering. Standard soda-lime glass, like that used in common bottles or jars, is not suitable and can easily break under the stress.
Other Autoclavable Materials
Beyond polypropylene and borosilicate glass, several other materials are commonly sterilized in autoclaves. These include stainless steel instruments (forceps, scalpels, trays), certain types of silicone tubing, and heat-resistant polymers like polycarbonate (PC), though PC may yellow and become brittle over time with repeated autoclaving.
Materials to Absolutely Avoid and Why
Placing non-autoclavable materials in an autoclave can lead to equipment damage, release of toxic fumes, and failed sterilization. Materials to strictly avoid include:
- Polystyrene (PS): Melts at a low temperature, creating a hazardous mess.
- Polyethylene (PE): Both low-density (LDPE) and high-density (HDPE) have melting points below standard autoclave temperatures.
- PVC (Polyvinyl Chloride): Can melt and release harmful hydrochloric acid fumes.
- Flammable or Corrosive Chemicals: Bleach, acids, and solvents should never be autoclaved.
Best Practices for Material Selection
Always verify material compatibility with the manufacturer’s guidelines. Items intended for autoclaving are typically marked with a symbol or explicitly stated as “autoclavable.” When in doubt, do not autoclave. Choosing correctly from the start prevents costly damage and ensures the safety of the laboratory environment.
Preparation for Effective Sterilization: Optimizing Your Load
Essential Cleaning and Pre-treatment
Before sterilization, all items, including pipette boxes, must be thoroughly cleaned. Any residual debris, chemicals, or biological material can shield microorganisms from the steam, leading to incomplete sterilization. Wash boxes with a suitable laboratory detergent and rinse thoroughly with deionized water to remove any residues that could interfere with the process.
Packaging Techniques for Optimal Steam Penetration
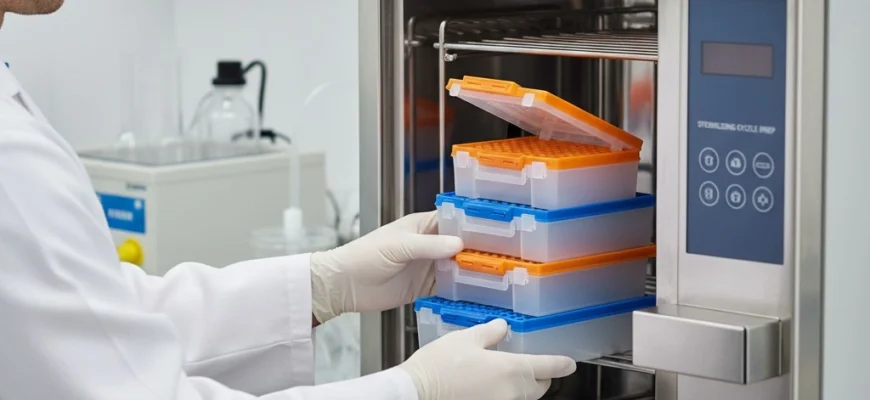
Proper packaging is critical for ensuring that steam reaches every surface. For pipette boxes, ensure the lids are slightly ajar or loosened. A tightly sealed container will prevent steam from entering, rendering the sterilization attempt useless. If using autoclave bags, do not seal them tightly; allow room for air to escape and steam to enter. Avoid wrapping boxes in aluminum foil, as it acts as a barrier to steam.
Specifics for Different Lab Supplies
While empty pipette boxes are straightforward, other items require specific preparation. When you sterilize media or autoclave liquids, the caps must be significantly loosened to prevent pressure buildup and potential explosions. Instruments should be arranged in a single layer in a tray or pouch to maximize surface exposure to the steam.
Loading Procedures for Success
How you load the autoclave directly impacts its effectiveness. Do not overload the chamber. Leave ample space between items to allow for free circulation of steam. Place items in a way that facilitates steam penetration and condensation drainage. For pipette boxes, placing them on their sides can help prevent water from pooling inside. Heavier items should be placed on lower shelves.
Autoclave Operation: Selecting and Running the Right Cycle
Understanding Autoclave Cycles
Autoclaves offer different cycle types for various loads. The two most common are:
- Gravity (or Gravity Displacement) Cycle: Steam is pumped into the chamber, displacing the heavier, cooler air downwards and out through a drain. This is a standard cycle suitable for most laboratory waste, glassware, and robust items.
- Pre-vacuum (or Prevac) Cycle: The chamber is evacuated of air before steam is introduced. This allows for faster and more thorough steam penetration, making it ideal for porous loads like animal cages or wrapped surgical packs.
For plastic pipette boxes, a standard gravity cycle is typically sufficient.
Optimal Autoclave Settings: Temperature and Pressure Parameters
The universally accepted standard for sterilizing most lab equipment, including polypropylene pipette boxes, is an autoclave cycle at 121°C (250°F) and 15 psi for a minimum of 15-30 minutes. For denser or larger loads, the time may need to be extended to ensure the core of the load reaches the target temperature for the required duration.
The Importance of Exhaust and Cooling
After the sterilization phase, the exhaust cycle begins. The chamber is slowly depressurized and steam is vented. A slow exhaust is crucial for liquids to prevent them from boiling over. For dry goods like pipette boxes, a faster exhaust can be used. Following the cycle, an adequate cooling time is essential for safety and to allow items to dry, preventing recontamination from moisture.
Starting the Autoclave and Monitoring
Before starting a cycle, ensure the autoclave door is securely sealed. Select the appropriate cycle for your load (e.g., “Gravity” or “Dry Goods”). Once the cycle starts, do not attempt to open the door. Modern autoclaves will lock until the cycle is complete and the chamber has been safely depressurized. It is critical to maintain a detailed autoclave log, recording the date, cycle type, contents, and operator for every run.
Safety First: Essential Protocols for Autoclave Use
Personal Protective Equipment (PPE)
Operating an autoclave involves significant hazards from high temperatures and pressure. Proper Personal Protective Equipment (PPE) is mandatory. This includes:
- A lab coat to protect from splashes.
- Safety glasses or a face shield to protect the eyes.
- Heat-resistant gloves to handle hot items and the autoclave door.
- Closed-toe shoes to protect feet from spills or dropped items.
Handling Biohazardous Materials and Waste
When autoclaving items contaminated with biohazardous material, they must be placed inside designated, autoclavable biohazard bags. These bags should be left partially open to allow steam to enter. A tray should be placed underneath to contain any potential leaks. This protocol is critical for safely decontaminating biological waste before disposal.
Autoclave Room Safety and Fume Management
The autoclave room should be well-ventilated to dissipate heat and steam. Ensure the area around the autoclave is clear of clutter. Be aware that some materials, if accidentally autoclaved, can release noxious fumes. Never place volatile or corrosive chemicals inside.
Emergency Procedures and Training
All personnel who use an autoclave must receive comprehensive training on its safe operation, loading procedures, and emergency protocols. This includes knowing the location of the emergency stop button and understanding procedures for handling a malfunction or a spill of biohazardous waste.
Validation and Quality Assurance: Proving Sterility
The Role of Sterilization Indicators
You cannot confirm sterility by sight alone. Autoclave validation relies on indicators to prove that the necessary conditions for sterilization were met.
- Chemical Indicators: These are tapes or strips that change color when exposed to a specific temperature. Autoclave tape is a common example. It provides immediate proof that the load has been through a heat cycle but does not confirm sterility.
- Biological Indicators (BIs): These are the gold standard for autoclave validation. They contain spores of a highly heat-resistant bacterium, typically Geobacillus stearothermophilus. After a cycle, the biological indicator vials are incubated. If the spores were killed, there is no growth, confirming a successful sterilization cycle. Regular use of BIs is essential for quality assurance in any laboratory environment.
Conclusion
Mastering the art of sterilizing plastic pipette boxes is a cornerstone of maintaining a truly sterile environment in the lab. It begins with selecting the right material—polypropylene—and meticulously following a protocol that encompasses thorough cleaning, strategic loading for optimal steam penetration, and running a validated autoclave cycle at the correct temperature and pressure. Safety is paramount, demanding the consistent use of PPE and adherence to established lab safety procedures, especially when handling biohazardous waste.
Ultimately, the goal is not just to run a cycle but to achieve verifiable sterility. This is where quality assurance practices, such as the diligent use of both chemical and biological indicators and maintaining a precise autoclave log, become indispensable. By integrating these best practices, laboratories can ensure their reusable pipette boxes are not a source of contamination but a reliable component of reproducible, high-integrity research. This commitment to proper sterilization also supports sustainability; as scientific research creates over 5.5 million tons of plastic waste annually, correctly reusing materials is a small but significant step towards a more responsible scientific practice.

