In biological laboratories, medical testing institutions, and countless scientific research fields, precision in liquid handling is paramount. The integrity of an entire experiment—from microbiological detection to work with sensitive biological samples—relies on the humble pipette tip. But accuracy is only half the battle. True reproducibility comes from eliminating microbial contamination, a task where the sterilization process is the undisputed champion.
Autoclaving pipette tips is a cornerstone of lab safety and one of the most critical Best Practices for preventing sample carry-over. This guide provides a comprehensive walkthrough of the proper sterilization process for pipette tips, ensuring your research is built on a foundation of absolute sterility.
Why Sterilization is Non-Negotiable
The primary reason to autoclave pipette tips is to eliminate all forms of microbial life, preventing the residual contamination that can invalidate experiments. Steam autoclaves, which utilize high-pressure sterilization technology, are considered the most effective method for sterilizing laboratory instruments.
-
Preventing Contamination: Non-sterile tips can introduce unwanted microbes into biological samples or chemical reagents, leading to failed experiments or inaccurate results. This is especially critical for work with biohazardous materials or applications with stringent aseptic operation requirements.
-
Ensuring Reproducibility: Contamination introduces an uncontrolled variable that undermines scientific reliability. Using properly sterilized tips is essential for consistent and trustworthy data.
-
Safety and Compliance: Sterilization inactivates potentially hazardous microbes, protecting lab personnel. Adherence to standards like ISO 11137 (Sterilization of health care products — Radiation) ensures that sterilization processes meet international safety and efficacy benchmarks.
Choosing the Right Tips for Your Autoclave
Before starting, confirm your tips are compatible with high-temperature sterilization.
-
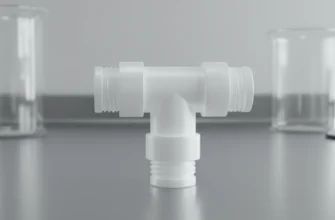
Material: The vast majority of autoclavable tips are made from polypropylene (PP material tips). This polymer has a high melting point and remains stable at the standard autoclave temperature of 121°C. Materials like polystyrene will melt.
-
Tip Type:
-
Filter tips: Many sterile filter tips are designed to be autoclaved, but it’s crucial to check manufacturer guidelines as the heat can sometimes affect the filter’s integrity.
-
Low retention tips: Also known as low binding tips, these can often be autoclaved, though repeated cycles may degrade their special coating over time.
-
Specialty Tips: For extended length or wide bore tips, always confirm autoclavability with the manufacturer’s Customer Service or product documentation.
-
The Step-by-Step Guide to Autoclaving Pipette Tips
Achieving verifiable sterility requires the right sterilization equipment and a meticulous process. A modern Lab Autoclave, such as a unit from Priorclave North America, functions much like a sophisticated pressure cooker, using pressurized steam to kill microbes.
Essential Equipment:
-
Lab Autoclaves (gravity displacement or pre-vacuum models)
-
Autoclave-safe racks or a dedicated sterilization case
-
Refilled tip tray or tips in boxes
-
Distilled water for the autoclave’s steam generation
-
Autoclave tape and chemical indicators
-
Biological indicators (for validation)
-
Heat-resistant gloves and safety glasses
The Process:
-
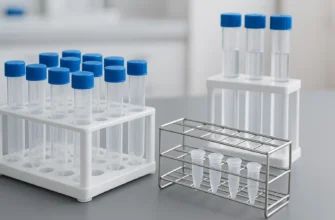
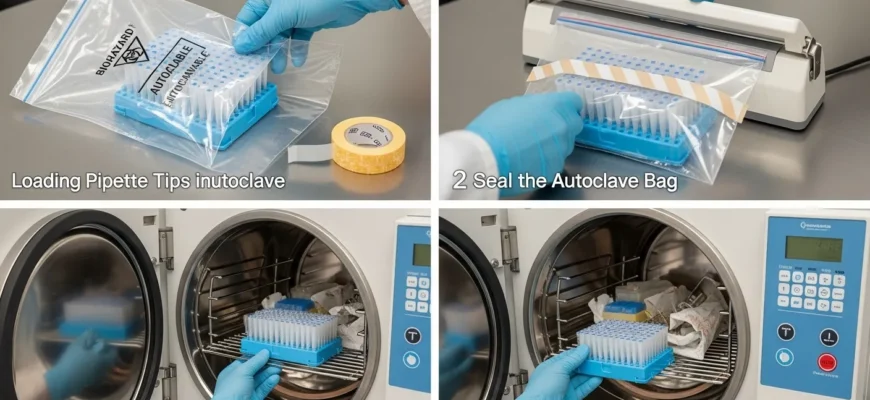
Preparation: Arrange your pipette tips in an autoclave-safe rack or tip tray. Do not pack them too tightly, as this will impede air circulation. If your sterilization case has a locking tab, ensure it is slightly loosened to allow steam to enter. Place the racks inside an autoclave bag or directly on the shelf.
-
Packaging and Indicators: Apply a strip of autoclave tape to the outside of the box or bag. For better verification, place a chemical indicator strip inside the load.
-
Loading the Autoclave: Place the tip boxes in the chamber, leaving space between items. Do not stack them. This ensures steam can reach all surfaces. Add other autoclavable tools like a Bottle Top Dispenser or even metal scissors in the same load if needed.
-
Setting the Cycle: A standard cycle for dry loads of polypropylene is:
-
Temperature: 121°C (250°F)
-
Pressure: 15–20 psi (check the pressure gauge)
-
Time: A minimum of 20 minutes of exposure time.
-
-
Running the Cycle: Securely lock the autoclave door and start the cycle. Modern Lab Autoclaves often have pre-programmed cycles for different load types. Do not interrupt the cycle once it begins.
-
Drying and Cooling: Once the cycle is complete and the pressure returns to zero, carefully open the door a crack to vent residual steam. Use the autoclave’s dry setting or place the hot racks in a heated drying cabinet to ensure all moisture evaporates, preventing re-contamination.
Verification: The Proof of Sterility
You cannot see sterility; you must verify it. This is a crucial step in your Best Practices.
| Indicator Type | Purpose | How it Works |
|---|---|---|
| Autoclave Tape | Basic check | Heat-sensitive stripes change color to confirm the load reached the target temperature. It does not confirm duration or steam penetration. |
| Chemical Indicators | Better assurance | Strips change color in response to a combination of time, temperature, and steam, offering a more reliable indication that sterilization conditions were met inside the package. |
| Biological Indicators | Gold standard validation | Vials containing heat-resistant spores (Geobacillus stearothermophilus) are placed in the load. If the autoclave cycle was successful, the spores are killed, and no growth will occur during incubation. |
For ongoing quality control, maintain an autoclave log. Record the date, cycle parameters, contents, and the results of all indicators used. For advanced cleaning verification before sterilization, methods like ATP swab analysis can be used to detect any remaining chemical residues or organic matter.