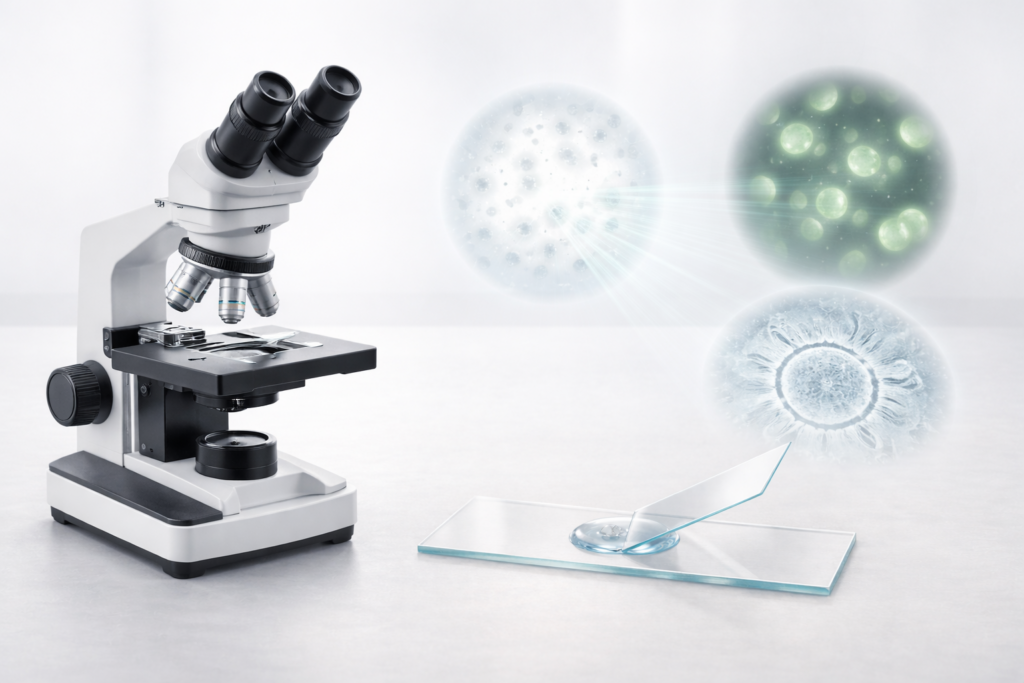
Microscopy is often misunderstood as merely the use of a tool-the microscope. In reality, microscopy is a rigorous methodological discipline that bridges the macroscopic and microscopic worlds. It is the foundational interface of biology, materials science, and medical diagnostics, relying less on the instrument’s brand and more on the operator’s understanding of the physics of light, sample chemistry, and image formation.
Students often believe that magnification-making an object appear larger-is the primary goal of microscopy. It is not. The primary goals are resolution (distinguishing two points as separate) and contrast (distinguishing the signal from the background). A sample magnified 2000x without sufficient resolution is merely “empty magnification”-a blur. Furthermore, the most sophisticated optical microscopy system cannot compensate for poor sample preparation. A poorly fixed, improperly stained, or thickly mounted sample will yield substandard data regardless of the lens quality.
This guide provides a reference-level overview of microscopy techniques, from the physics of bright-field illumination to the optical sectioning of confocal microscopy. It is designed to replace fragmented laboratory handouts with a cohesive understanding of how to generate high-fidelity data.
Section 1 – Foundations of Microscopy
The Difference Between Microscope and Microscopy
A microscope is hardware; microscopy is the science of information retrieval. The hardware consists of lenses, stages, and illumination sources. The science involves manipulating the path of light (or electrons) to interact with a specimen in a way that reveals invisible structures.
Image Formation Basics
In light microscopy, an image is formed when light interacts with a specimen and is then diffracted by the objective lens. The objective lens collects this diffracted light and recombines it to form an intermediate image, which is then further magnified by the eyepieces.
The fundamental limit of this process is governed by the wave nature of light. The German physicist Ernst Abbe described the diffraction limit, which dictates that a microscope cannot resolve details smaller than approximately half the wavelength of the light used. This is why blue light (shorter wavelength) provides better resolution than red light.
Resolution vs. Magnification vs. Contrast
- Magnification: The ratio of the image size to the object size. It is a linear scalar with no inherent quality metric.
- Resolution (Resolving Power): The ability to distinguish two distinct points that are close together. Resolution is determined by the Numerical Aperture (NA) of the objective lens and the wavelength of light.
d=NA0.61λ
Where d is the minimum resolvable distance, λ is the wavelength, and NA is the numerical aperture . - Contrast: The difference in light intensity (brightness) or color between the specimen and the background. Most biological samples are transparent and essentially invisible in standard light; contrast must be introduced either optically (Phase Contrast, DIC) or chemically (staining).
Section 2 – Core Microscopy Techniques
Selecting the correct technique is about matching the method of contrast generation to the physical properties of the sample.
Light / Optical Microscopy
Bright-field Microscopy
Bright-field is the simplest form of optical microscopy. Light passes directly through the specimen. Contrast is generated by light absorption; dense or pigmented regions absorb light and appear dark against a bright background .
- Best for: Naturally pigmented samples (chloroplasts), stained histology sections, or high-contrast synthetic fibers.
- Limitation: Low contrast for live, unstained cells, which appear almost invisible.
Dark-field Microscopy
A central stop in the condenser blocks direct light, allowing only oblique rays to strike the sample. Only light scattered by the specimen enters the objective. The sample appears luminous against a pitch-black background.
- Best for: Diatoms, bacteria, and unfixed small organisms.
Phase Contrast Microscopy
Developed by Frits Zernike, phase contrast microscopy exploits the fact that light slows down when passing through biological structures (which have a higher refractive index than water). The human eye cannot detect these “phase shifts,” but the phase contrast microscope converts them into “amplitude shifts” (brightness differences) using a phase ring in the objective and an annulus in the condenser .
- Best for: Living, unstained cells (culture dishes), monitoring cell cycle and motility.
- Artifacts: Produces a characteristic “halo” around bright objects, which can obscure edge details.
Differential Interference Contrast (DIC)
Also known as Nomarski interference contrast, DIC uses polarized light and beam-shearing prisms (Wollaston prisms) to separate light into two orthogonal beams. When these beams recombine, they interfere based on the gradient of the optical path length.
- Visual Result: A pseudo-3D relief effect. One side of a structure appears bright, the other in shadow.
- Best for: Thick specimens, protozoa, and visualizing detailed surface topography of unstained samples.
- Limitation: Cannot be used with plastic dishes (which are birefringent) or other birefringent samples .
Polarized Light Microscopy
Uses two polarizing filters (polarizer and analyzer) to visualize materials that are birefringent (anisotropic), meaning they have two refractive indices.
- Best for: Mineralogy, crystallography, and biological structures with highly aligned molecules like muscle fibers, collagen, or starch grains.
Fluorescence & Confocal Microscopy
Widefield Fluorescence Microscopy
Fluorescence microscopy relies on the Stokes shift: a specimen is excited with high-energy light (e.g., blue), and it emits lower-energy light (e.g., green). This requires specific fluorophores-molecules that fluorescence. The microscope uses a dichroic mirror to reflect excitation light toward the sample while letting emission light pass to the eye.
- Key Advantage: Specificity. You can stain just the nucleus or just the mitochondria, ignoring the rest of the cell.
Confocal Microscopy
A variation of fluorescence that solves the “blur” problem of widefield systems. In widefield, fluorescence from above and below the focal plane blurs the image. Confocal microscopy uses a spatial pinhole to physically block out-of-focus light.
- Optical Sectioning: The pinhole allows the microscope to image thin “slices” of a thick specimen, which can be reconstructed into a 3D model .
Electron Microscopy (Overview)
When light waves are too large to resolve nanometer-scale details, electron beams (with wavelengths ~100,000x shorter than visible light) are used.
- TEM (Transmission Electron Microscopy): Electrons pass through a thin slice. Analogous to bright-field. High internal resolution.
- SEM (Scanning Electron Microscopy): Electrons scan the surface, creating 3D topology. Analogous to reflected light.
Section 3 – Sample Preparation for Microscopy
Sample preparation is often the bottleneck in imaging. A perfect microscope cannot fix a destroyed sample.
Fixation: The Art of Stasis
Fixation prevents decay (autolysis) and preserves structure.
- Cross-linking Fixatives (Aldehydes): Formaldehyde and glutaraldehyde form covalent bonds between proteins (lysine residues). This creates a rigid gel network that preserves 3D structure excellently . This is required for electron microscopy and high-resolution fluorescence microscopy.
- Precipitating Fixatives (Alcohols): Methanol or acetone remove water, causing proteins to coagulate and precipitate. While fast, they shrink cells and destroy 3D volume, making them poor choices for confocal microscopy .
Staining: Creating Chemical Contrast
Since biological tissue is mostly water and protein (low natural contrast), we use stains.
- Histological Stains: Hematoxylin (basic, binds to acidic DNA, blue) and Eosin (acidic, binds to basic proteins, pink) are the standard.
- Fluorescent Probes: Small molecules (like DAPI for DNA) or antibody-conjugated fluorophores (Immunofluorescence) that target specific proteins with lock-and-key precision.
Sectioning and Embedding
Light cannot pass through a 1cm block of tissue.
- Embedding: Tissue is dehydrated and infiltrated with paraffin wax or resin to make it hard enough to cut.
- Sectioning: A microtome slices the block into ribbons 4–10 micrometers thick (one cell layer thick).
Mounting Media
Specimens must be mounted under a coverslip. The mounting medium must have a refractive index close to glass (1.51) to prevent light scattering. For fluorescence, anti-fade agents are added to retard photobleaching.
Section 4 – Laboratory Basics & Best Practices
Proper Microscope Setup: Köhler Illumination
The most common error in student labs is improper condenser alignment. Köhler illumination ensures the light path is uniform and focused. It relies on aligning two sets of conjugate planes: the illumination (aperture) set and the imaging (field) set .
Simplified Protocol:
- Focus on the specimen with a 10x objective.
- Close the field diaphragm (at the base) until you see a polygon of light.
- Adjust the condenser height knob until the edges of that polygon are sharp.
- Center the polygon using the condenser centering screws.
- Open the diaphragm just until it clears the field of view.
Focusing and Slide Handling
- Start Low: Always find the sample with the lowest power objective (4x or 10x). High-power lenses have a tiny field of view, making it impossible to “search” for a sample.
- Coarse vs. Fine: Never use the coarse focus knob with high-magnification objectives (40x, 100x). You risk cracking the slide or the lens.
Oil Immersion
Objectives with magnification >40x usually require immersion oil. Because the refractive index of air (1.0) is lower than glass (1.51), light rays refract away from the lens. Oil matches the glass index, allowing the lens to capture highly diffracted rays, effectively increasing the Numerical Aperture (NA) and resolution.
Section 5 – Choosing the Right Microscopy Technique
| Specimen Type | Question | Recommended Technique |
|---|---|---|
| Living Cells | Are they thin/monolayer? | Phase Contrast |
| Living Cells | Are they thick or protozoa? | DIC (Differential Interference Contrast) |
| Fixed Tissue | Is it stained (H&E)? | Bright-field |
| Fixed Tissue | Do you need specific proteins? | Fluorescence Microscopy |
| Thick Tissue (>20µm) | Do you need 3D data? | Confocal Microscopy |
| Bacteria | Unstained/Swimming? | Dark-field |
| Crystals/Plastics | Is it birefringent? | Polarized Light Microscopy (Avoid DIC) |
Section 6 – Limitations of Microscopy
The Diffraction Limit
No matter how much you magnify, optical microscopy is limited by physics to a resolution of roughly 200nm (0.2µm). To see viruses or protein complexes smaller than this, one must move to electron microscopy or super-resolution techniques.
Artifacts
“What you see is what you prepared.”
- Shrinkage: Alcohol fixation can shrink cells by 50% .
- Halos: Phase contrast creates white halos that are not real structures.
- Photobleaching: In fluorescence, the signal fades over time as high-energy light destroys the fluorophore.
Trade-offs
There is no “perfect” image.
- High resolution (oil immersion) $\rightarrow$ Small field of view + shallow depth of field.
- High contrast (staining) $\rightarrow$ usually requires killing the cell.
- Live imaging $\rightarrow$ Lower resolution + risk of phototoxicity.
Section 7 – Applications Across Disciplines
- Cell Biology: Heavily relies on fluorescence microscopy and confocal microscopy to track protein localization and dynamic processes in living cells.
- Medicine (Pathology): Almost exclusively uses bright-field microscopy of H&E stained tissue sections for cancer diagnosis. The trained pathologist looks for morphological changes in nuclear structure.
- Materials Science: Uses polarized light microscopy and SEM to analyze crystalline structures, stress fractures in metals, and fiber alignment in composites.
- Education: Primarily utilizes bright-field and phase contrast due to durability and cost-effectiveness, focusing on teaching the fundamentals of optics and observation.
FAQ
What is microscopy?
Microscopy is the technical field of using microscopes to view objects and areas of objects that cannot be seen with the naked eye. It encompasses the physics of light, the chemistry of sample preparation, and the analysis of image data.
What are the main types of microscopy?
The three main categories are optical microscopy (using visible light), electron microscopy (using electron beams), and scanning probe microscopy (using physical probes). Within optical, common types include bright-field, phase contrast, and fluorescence microscopy.
What is the difference between light microscopy and fluorescence microscopy?
Light microscopy generally refers to techniques like bright-field or phase contrast that use the full spectrum of visible light to illuminate a sample. Fluorescence microscopy is a specialized form of light microscopy that uses specific wavelengths to excite fluorophores, isolating only the light emitted by those specific molecules against a dark background.
What is phase contrast microscopy used for?
Phase contrast microscopy is primarily used for viewing unstained, living cells. It converts invisible differences in the refractive index of cellular components into visible differences in brightness, allowing structures like nuclei and organelles to be seen without killing the cell with stains .
How are samples prepared for microscopy?
Preparation depends on the sample. For live viewing, samples are placed in a wet mount or culture dish. For detailed structural analysis, samples are typically fixed (chemically preserved), dehydrated, embedded in wax, sectioned into thin slices, and stained to create contrast.
What is the difference between microscope and microscopy?
A microscope is the instrument (hardware) used to magnify images. Microscopy is the scientific discipline (methodology) involving the theory, application, and technique of using the instrument to gather data.
What magnification is commonly used in labs?
Standard laboratory microscopes typically offer a range of magnifications via objective lenses: 4x (scanning), 10x (low power), 40x (high dry), and 100x (oil immersion). When multiplied by the 10x eyepiece, total magnifications are 40x, 100x, 400x, and 1000x.
Conclusion
Microscopy is not a passive activity; it is an active interrogation of nature. Whether using simple bright-field optics or advanced confocal microscopy, the quality of the data is determined by the operator’s adherence to the fundamentals: proper contrast microscopy selection, rigorous sample preparation, and precise optical alignment. Understanding these principles transforms the microscope from a simple magnifying glass into a powerful analytical instrument capable of revealing the mechanisms of life.