If your microscope slide is prepared poorly, a $2,000 microscope will yield a $20 image. The quality of your slide preparation-specifically the thinness of the sample and the clarity of the mounting medium-determines the resolution and contrast you see through the eyepiece.
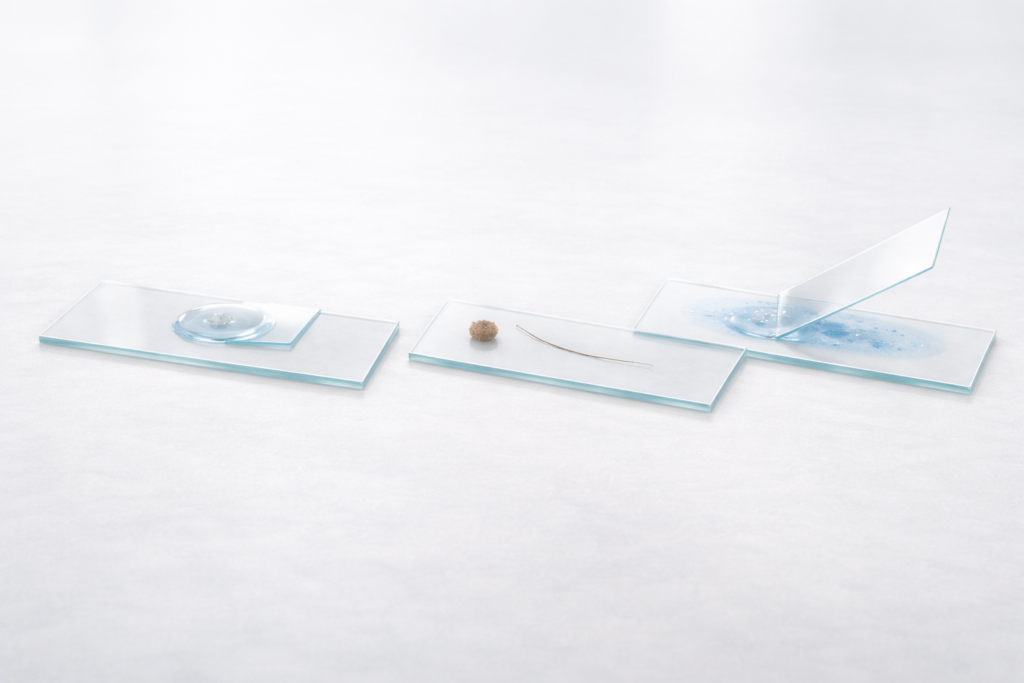
In this guide, you will learn the practical, standard operating procedures for the three core methods of microscope slide preparation: the wet mount for living or liquid samples, the dry mount for inanimate objects, and the smear mount for cell suspensions like blood or bacteria. We will also cover how to perform slide staining to add contrast to transparent specimens and provide a troubleshooting checklist to rescue slides that are drifting, bubbly, or blurry.
Choose the Right Method
Before you begin, you must match your technique to your sample. Using the wrong mount results in crushed specimens, dried-out cells, or optics that cannot focus.
Use this decision framework to select the correct method:
| Sample Type | Best Method | Why? | Common Pitfall |
|---|---|---|---|
| Living organisms (pond water, yeast) or Liquids | Wet Mount | Keeps organisms alive and hydrated; allows movement. | Bubbles: Trapped air looks like black donuts and ruins the view. |
| Solid, dry objects (pollen, hair, insect legs, dust) | Dry Mount | Quickest method; no liquid needed to distort the sample. | Thickness: Specimen is too thick, preventing the cover glass from sitting flat. |
| Cell suspensions (blood, bacteria culture) | Smear Mount | Spreads cells into a single layer (monolayer) for individual counting. | Clumping: Cells pile up, making it impossible to see individual shapes. |
| Transparent samples (cheek cells, bacteria) | Staining (Add-on) | Adds contrast; most biological cells are naturally clear and invisible. | Overstaining: Specimen becomes a solid black/blue blob. |
Tools & Materials
You do not need an advanced lab setup, but you must have clean glassware. Even a single fingerprint on a microscope slide causes light distortion that ruins high-magnification viewing.
Essential Checklist:
- Microscope slides: Standard 75mm x 25mm glass slides.
- Coverslips: Thin glass squares (usually 18mm or 22mm).
- Dropper or Pipette: For controlling liquid volume.
- Tweezers/Forceps: Fine-tipped for handling solid samples.
- Mounting Medium: usually water, saline, or immersion oil.
- Paper Towel / Kimwipes: For wicking excess liquid.
- Lens Paper: For cleaning glass surfaces without scratching.
- Optional: Stains like methylene blue or iodine.
Cleanliness Rule: Always hold microscope slides and coverslips by their edges. Oil from your skin etches into the glass and attracts dust.
Section 3 – Wet Mount (Step-by-Step)
The wet mount is the most common technique for general biology. It suspends the specimen in a drop of liquid, creating a flat optical plane and keeping the sample hydrated.
Procedure:
- Clean the slide: Wipe the slide with lens paper to remove dust.
- Add liquid: Place one single drop of water (or saline) in the center of the slide.
- Add specimen: Using tweezers, place your specimen into the drop. If the sample is liquid (like pond water), just place one drop of the sample directly on the slide.
- Position the coverslip: Hold the coverslip by its edges. Place one edge of the coverslip against the slide surface, touching the edge of the water drop.
- The 45-degree angle: Lower the coverslip slowly at a 45-degree angle. This is the critical step; it pushes air out ahead of the water.
- Drop and settle: Let the coverslip fall gently. The water should spread to the edges of the coverslip but not beyond.
- Wick excess: If liquid is oozing out, touch a paper towel to the edge of the coverslip to absorb it.
Quality Control:
- Good Wet Mount: The water fills the square exactly. The specimen is centered. There are zero or very few air bubbles.
- Bad Wet Mount: The coverslip is “floating” and sliding around (too much water), or large black rings (bubbles) obscure the view.
Common Mistakes:
- Dropping the coverslip flat: This traps air instantly. Always use the 45-degree angle.
- Too much water: The coverslip floats, and the specimen drifts out of view.
- Sample drying out: The heat from the microscope light evaporates the water. Add a tiny drop of water to the edge of the coverslip to re-hydrate if needed.
Section 4 – Dry Mount (Step-by-Step)
A dry mount is the simplest form of slide preparation. It uses no liquid and is intended for inanimate samples that do not need to be kept alive or hydrated.
Procedure:
- Select sample: Choose something naturally thin, such as a hair strand, a wing from a dead insect, or pollen grains.
- Place sample: Center the specimen on a clean microscope slide.
- Cover: Place a coverslip over the specimen. While the coverslip isn’t strictly necessary for low power, it protects your objective lens from touching the sample.
- Secure (Optional): For a semi-permanent mount, you can use clear nail polish on the corners of the coverslip to glue it down.
When it Fails:
- Sample too thick: If the specimen is thick (like a whole bug), the coverslip will teeter-totter. This prevents the high-power objectives from getting close enough to focus.
- Low Contrast: Without a liquid medium to refract light, some transparent dry samples (like clear fibers) may look washed out. Refractive index matters-air has a refractive index of 1.0, while glass is ~1.5. This mismatch can cause glare.
Section 5 – Smear Mount (The Thin Film)
The smear mount is critical for blood, bacterial cultures, or semen analysis. The goal is to create a gradient of thickness so you can find an area where cells are spread in a monolayer.
Procedure:
- The Drop: Place a small drop of your sample (blood or culture) about 1 inch from the end of the slide.
- The Spreader: Take a second clean slide (“spreader slide”). Hold it at a 45-degree angle.
- Back into the drop: Back the spreader slide into the drop until the liquid spreads across the width of the spreader edge.
- The Push: Immediately push the spreader slide forward smoothly and quickly. Do not stop halfway.
- Dry: Let the slide mount air-dry completely.
- Fixation: Pass the slide through a flame 2-3 times (specimen side up) or dip in methanol to “fix” the cells to the glass so they don’t wash off during staining.
Quality Control:
- The Feathered Edge: A good smear ends in a “feathered edge” where the sample fades to nothing. This is the optimal viewing zone.
- Mistakes: A smear that is thick and dark will pile cells on top of each other, making identification impossible. If the smear has ridges or lines, you hesitated during the “push” step.
Section 6 – Staining (Adding Contrast)
Most biological cells are essentially bags of water-transparent and difficult to see. Slide staining provides the contrast needed to identify nuclei, cell walls, and bacteria.
Method A: Direct Staining
Best for simple checks where you don’t need a permanent slide.
- Prepare a smear mount and heat-fix it (see Section 5).
- Add 1-2 drops of stain (like methylene blue, Crystal Violet, or Iodine) directly onto the dried smear.
- Wait 60 seconds (timing depends on the stain).
- Gently rinse with water until the run-off is clear.
- Blot dry (do not rub) with bibulous paper or a paper towel.
Method B: Irrigation (Wicking)
Best for staining a wet mount without disturbing the setup.
- Prepare a standard wet mount with a coverslip.
- Place one drop of stain (e.g., methylene blue) on the slide, right next to one edge of the coverslip.
- Take a small piece of paper towel and touch it to the opposite edge of the coverslip.
- Capillary Action: The paper towel will suck water out, pulling the stain under the coverslip and across the specimen.
Warning: Stains like methylene blue and Gram stain are permanent dyes. They will stain your skin, clothes, and lab bench. Always wear gloves and place a paper towel under your workspace.
Section 7 – Troubleshooting Diagnostic
If your image looks wrong, the issue is usually in the slide preparation, not the microscope mechanics. Use this checklist to diagnose the problem.
1. Image is “Drifting” or Moving
- Cause: Too much liquid in the wet mount. The coverslip is floating on a thick cushion of water.
- Fix: Touch a paper towel to the edge of the coverslip to wick away excess liquid until the coverslip settles firmly.
2. Black “Donuts” or Rings in Image
- Cause: Air bubbles. This happens when the coverslip is dropped flat instead of lowered at an angle.
- Fix: It is hard to remove bubbles once trapped. If they block the specimen, you must remake the slide. Tap the coverslip gently with a pencil eraser to move bubbles to the side.
3. Unable to Focus at High Power (40x/100x)
- Cause: The sample is too thick, or the slide is upside down.
- Fix: Ensure the coverslip is on top. If the sample is a thick chunk (dry mount), you cannot use high power objectives; they will crash into the slide before focusing.
4. Specimen is Very Dark or “Blobby”
- Cause: Overstaining or specimen is too dense.
- Fix: For stains, reduce the timing. For smears, use a smaller drop and faster spreading motion to get a thinner layer.
5. “Dust” That Rotates
- Cause: Dirty optics vs. dirty slide.
- Fix: Rotate the eyepiece. If the speck moves, the dirt is on the eyepiece. If it stays still, the dirt is on your microscope slides or coverslip.
Section 8 – Best Practices for the Lab
Professional slide preparation involves habits that protect both your data and your equipment.
- Labeling: Always label your slides. Use a marker on the frosted end of the slide. Include the Specimen Name, Date, and Orientation (e.g., “Top”). If you don’t label, you will forget which drop was which.
- Avoiding Contamination: Never touch the tip of a dropper to the slide surface. If the dropper touches a bacterial colony, the entire bottle is contaminated.
- Protecting Objectives: Never let the high-power objective lens touch the liquid of a wet mount. It can seep into the lens housing and damage the glue holding the optics.
- Cleaning: Reusing slides is acceptable for students. Wash with warm soapy water and dry with a lint-free cloth. However, coverslips are fragile and usually disposable.
People Also Ask (FAQ)
How do you prepare slides dry mount and wet mount?
For a dry mount, place the specimen directly on the center of the slide and cover it with a coverslip; no liquid is used. For a wet mount, place a drop of water on the slide, add the specimen to the water, and lower the coverslip at a 45-degree angle to prevent air bubbles.
What are the steps to preparing a wet mount slide with stains?
The best method is “irrigation.” First, create a clear wet mount with a coverslip. Place a drop of stain at one edge of the coverslip and a paper towel at the opposite edge. The towel wicks the liquid through, pulling the stain across the specimen under the glass.
What are the 5 steps for creating a wet mount slide?
- Clean the microscope slide.
- Place a drop of water in the center.
- Place the specimen in the water.
- Lower the coverslip at a 45-degree angle.
- Wick away excess water with a paper towel.
How to prepare a microscope slide step by step?
Start by cleaning the slide to remove dust or oil. Choose your method (wet, dry, or smear) based on the sample type. Place your sample in the center, add a mounting medium if required (water/stain), and apply a coverslip carefully to flatten the sample and protect the microscope lens.
Why is it important to label microscope slides?
Labeling prevents confusion, especially when comparing multiple samples or when slides are stored for later reference. It ensures you know the specimen identity, the date of preparation, and the stain used, which is critical for accurate scientific recording.
Conclusion
Mastering microscope slide preparation is the first step toward professional microscopy. Whether you are performing a wet mount for pond life, a dry mount for insect wings, or a smear mount for blood cells, the principles remain the same: keep the sample thin, avoid air bubbles, and use staining only when necessary for contrast. By following the troubleshooting steps above, you can ensure clear, sharp images every time you look through the lens.