A dry mount is the simplest and most fundamental form of specimen preparation in microscopy. Unlike complex permanent mounts that require resin, or temporary wet mounts that utilize water or immersion oil, a dry mount consists of the specimen placed directly on the slide with no liquid medium between the slide and the coverslip.
In this technique, the medium surrounding the specimen is air. Because air has a refractive index (1.00) significantly different from glass (1.51) and most biological tissues, dry mounts provide high contrast but often lower resolution due to light scattering. Understanding when to choose this method versus a wet mount is critical for image quality. If a sample is moisture-sensitive, chemically reactive to water, or naturally opaque, a wet preparation may destroy the sample or obscure the details you are trying to observe. Mastering the dry mount is the first step in competent laboratory microscopy.
When to Use a Dry Mount
The dry mount technique is not suitable for every specimen. It is specifically designed for samples that are abiotic (non-living) or dead, and free of moisture. Because there is no liquid to support cellular integrity or facilitate light transmission through dense tissue, the sample must be naturally thin and resistant to desiccation.
Ideal Specimen Characteristics
The ideal candidate for a dry mount possesses specific physical traits:
- Inorganic or Non-living: Living cells will dry out, shrivel, and distort immediately.
- Thin and Flat: The depth of field on a compound microscope is very shallow. Thick objects will not focus properly.
- Moisture Sensitive: Some crystals dissolve in water; some pollens swell and burst. These require dry mounting.
Common Specimens for Dry Mounting
- Botanical matter: Pollen grains, seeds, dried leaf sections, flower petals (if thin).
- Animal material: Insect legs, wings (especially Lepidoptera scales), antennae, feathers, hair, fur.
- Fibrous materials: Wool, cotton, silk, synthetic fibers (nylon, polyester), paper fibers.
- Inorganic samples: Dust, micro-plastics, soil particles, atmospheric pollutants, geological sand grains (if small enough).
Comparison: Dry Mount vs. Wet Mount
| Feature | Dry Mount | Wet Mount |
|---|---|---|
| Medium | Air | Water, Saline, or Glycerin |
| Specimen Type | Dead, dry, inorganic, moisture-sensitive | Living aquatic, hydrated tissues, algae |
| Preparation Time | Very fast (< 1 minute) | Fast, but requires fluid handling |
| Sample Stability | High (specimen does not move) | Low (specimen floats/drifts) |
| Refractive Index | Low match (High Contrast) | Better match (High Clarity) |
| Preservation | Can be stored long-term if sealed | Temporary (dries out in minutes) |
Materials and Setup
To prepare a professional-quality slide, you must minimize contamination. In a dry mount, dust on the glass is often indistinguishable from the specimen itself.
Essential Equipment
- Microscope Slide: Standard 25mm x 75mm glass slides. For thicker dry specimens (like whole seeds or rocks), a “well slide” (concave slide) is preferred to prevent crushing the sample.
- Coverslip: A thin square of glass (typically No. 1 or No. 1.5 thickness). While some hobbyists view dry samples without a coverslip, this is poor practice as it exposes the objective lens to dust and potential scratches.
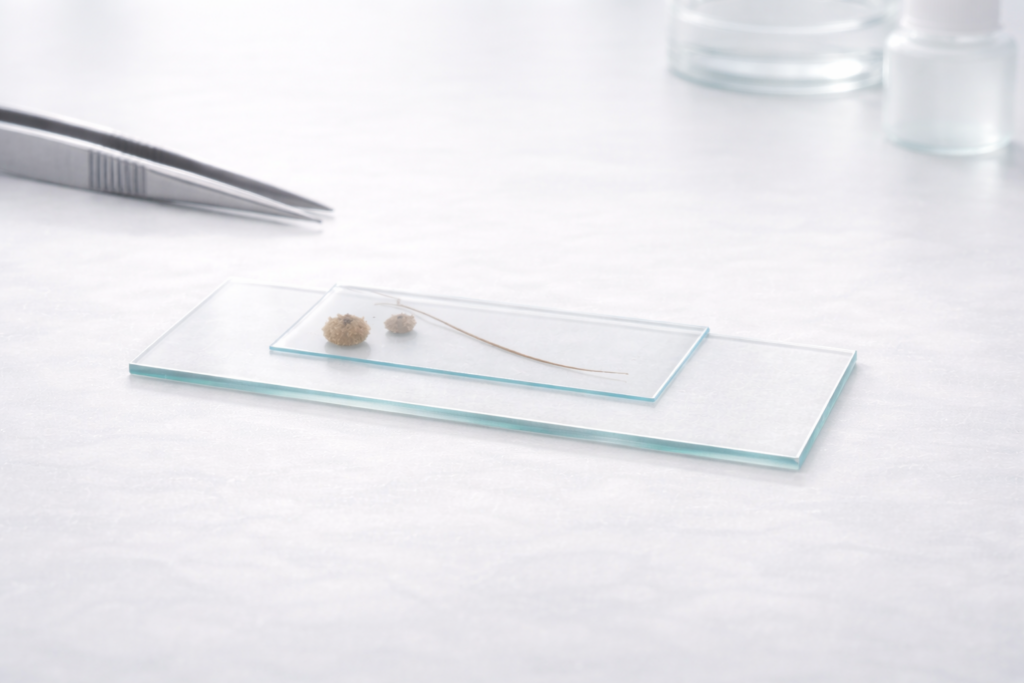
- Forceps (Tweezers): Fine-point entomology forceps are best for handling delicate items like insect wings or single hairs.
- Cleaning Supplies: Lens paper and 70% ethanol or a microfiber cloth.
A Note on Cleanliness
Before beginning slide preparation, inspect the glass against a light source. Oil from fingerprints acts as a smudge that degrades image sharpness. Since there is no water to wash away debris, any dust trapped under the coverslip becomes a permanent part of the image.
Step-by-Step Dry Mount Slide Preparation
Follow this Standard Operating Procedure (SOP) to ensure consistent results.
Step 1: Slide Sanitation
Wipe the microscope slide with a lint-free cloth or lens paper. If the slide is new from the box, it may have a thin film of manufacturing oil; clean it with a drop of alcohol if necessary. Ensure the slide is completely dry before proceeding.
Step 2: Specimen Selection and Thinning
Select a portion of your specimen. It must be translucent.
- For fibers/hair: Cut a segment no longer than 1 cm.
- For insect parts: Detach the leg or wing carefully.
- For solids: If the sample is too thick, use a razor blade or scalpel to shave a thin section. If light cannot pass through the sample, the microscope will only show a black silhouette.
Step 3: Specimen Placement
Using forceps, place the specimen in the exact center of the slide.
- Technique: Do not drop the sample from a height, as static electricity may cause it to jump off the glass. Touch the forceps to the glass and let the sample slide off.
- Orientation: Try to lay the sample flat. A twisted hair or folded wing will be difficult to focus on.
Step 4: Debris Check
Before covering, blow gently (using a puffer bulb, not your breath, to avoid moisture) on the sample to remove loose dust particles that may have settled during placement.
Step 5: Applying the Coverslip
Gently lower the coverslip over the specimen.
- The Drop Method: Hold the coverslip by the edges. Place one edge on the slide first, then lower the other side like a trapdoor. This minimizes air drafts that might blow a light specimen (like a dandelion seed) away.
- Do not press down: Unlike a wet mount, you do not need to squash the sample to spread fluid. Pressing down on a dry mount may crush the specimen or shatter the coverslip.
Step 6: Securing the Mount (Optional)
For temporary observation, gravity is sufficient to hold the coverslip. If you intend to keep the slide for future reference:
- Place small dots of clear nail polish or mounting cement on the four corners of the coverslip.
- Allow it to dry completely before viewing.
- Label the slide on the frosted edge with the specimen name and date.
Quality Criteria: What a Good Dry Mount Looks Like
A properly prepared dry mount is not simply a rock on a piece of glass. It requires specific optical qualities to be useful for study.
1. Correct Thickness and Planarity
The specimen should sit flat. If the sample is too thick, the coverslip will teeter-totter on top. This creates a “wedge” effect where one side of the field of view is in focus and the other is blurry. A high-quality dry mount allows the observer to bring the entire specimen into focus simultaneously at low power (4x or 10x).
2. Light Transmission
The sample must be translucent. When viewing through the eyepieces, you should see internal structures (like the medulla of a hair or the veins of a wing), not just a dark outline. If the object is solid black, it is too thick for a standard transmission microscope and requires a stereo (dissecting) microscope instead.
3. Field Cleanliness
The background should be clear white (brightfield). Specks, smudges, or fingerprints surrounding the specimen indicate poor handling. In a dry mount, these artifacts are more visible than in fluid mounts because air does not disguise refractive errors.
4. Specimen Integrity
The sample should retain its natural shape. While dehydration is expected, the sample should not be crushed or pulverized unless that was the intent. For example, a butterfly wing scale should remain attached to the wing membrane if possible, or isolated cleanly.
Common Mistakes and Fixes
Even experienced technicians occasionally struggle with dry mounts due to static electricity or thickness issues.
Troubleshooting Table
| Mistake | Observation | Root Cause | Corrective Action |
|---|---|---|---|
| The Black Blob | Specimen is solid black; no detail visible. | Specimen is too thick or opaque. | Tease the sample apart with needles or use a razor to slice a thinner section. |
| The Shifting Image | Specimen moves when the stage is moved. | Coverslip is loose or static charge is high. | Secure coverslip corners with adhesive; ensure the slide is not rubbing against the objective lens. |
| “Dirty” Background | Many small specks visible around the sample. | Dust contamination. | Clean slides with ethanol before use; keep coverslips in a covered box. |
| Cracked Coverslip | Glass shatters during focusing. | Sample is too high/thick for the objective. | Use a concave (well) slide for thick specimens or stick to low magnification (4x/10x). |
| Foggy Image | Image looks hazy or low contrast. | Fingerprints on the coverslip. | Wipe the exterior of the coverslip gently with lens paper. |
Dry Mount vs. Wet Mount: The Decision Logic
Choosing the correct slide mount technique depends on the chemistry of your specimen and the optics required.
Refractive Index and Contrast
Light behaves differently when passing through air versus water. Air has a refractive index of roughly 1.0, while biological specimens usually range from 1.3 to 1.5. This large difference creates “refraction artifacts”-strong outlines and high contrast. This is excellent for finding transparent fibers or crystals.
- Use Dry Mount: When you need high contrast to see the edges of a translucent object (e.g., detecting synthetic fibers).
- Use Wet Mount: When you need to see inside the object. Water (index 1.33) is closer to the specimen’s index, reducing the refraction at the edges and allowing light to pass through the cell walls to reveal organelles.
Chemical Stability
Certain biological samples degrade instantly upon contact with water.
- Pollen: Many pollen grains absorb water rapidly, swelling and changing shape. To study the natural morphology of pollen, a dry mount is essential.
- Crystals: Salt, sugar, and various chemical crystals will dissolve in a standard wet mount. Unless you are using oil, these must be mounted dry.
Notes on Staining
Novice microscopists often ask if they should stain a dry mount. The short answer is no.
Stains such as iodine, eosin, or methylene blue are chemical dyes dissolved in a liquid solvent (usually water or alcohol). The process of staining relies on the fluid permeating the cell walls and bonding to specific structures (like nuclei or starch granules).
If you apply methylene blue to a specimen, you have effectively created a wet mount. If you were to let that stain dry out completely, the dye would crystallize and obscure the specimen with artifacts. Therefore, staining is almost exclusively reserved for wet mounts or permanent resin mounts. Dry mounts rely on the natural pigmentation and refraction of the specimen for contrast.
Specimen-Specific Protocols
To achieve the best results, adjust your technique slightly based on the material.
Protocol A: Human or Animal Hair
Hair is one of the most common dry mount subjects, but it is cylindrical, which causes optical distortion.
- Clean the hair with alcohol to remove natural oils (sebum) which attract dust.
- Place two pieces of hair in an “X” pattern. This helps determine the depth of field.
- Tape the coverslip down tightly. Because hair is elastic, it may bow the coverslip if not secured.
Protocol B: Insect Wings
- Use a deceased insect found on a windowsill (do not kill an insect solely for this).
- Remove the wing using fine tweezers at the base.
- The wing must be perfectly flat. If it is curled, it cannot be dry mounted on a flat slide.
- Observe at 4x or 10x. Do not use 40x or 100x objectives, as the wing surface is rough and will crash into the lens.
Protocol C: Dust and Microfibers
- Take a piece of clear adhesive tape.
- Touch the sticky side to a dusty surface (bookshelf, carpet).
- Stick the tape gently onto the microscope slide.
- This acts as both the specimen holder and the coverslip. Note that the adhesive may slightly blur the image at high power, but it is excellent for rapid analysis.
FAQ / People Also Ask
1) How to prepare a dry mount slide?
To prepare a dry mount, clean a standard microscope slide to remove dust. Place a thin, dry specimen (like a hair or insect wing) in the center. Cover the specimen gently with a coverslip to protect the microscope lens. No water or chemical stains are used.
2) When would you use a dry mount vs. a wet mount slide?
You use a dry mount for non-living, waterproof, or moisture-sensitive samples (like pollen or crystals) where high contrast is needed. You use a wet mount for living organisms (like pond water protozoa) or tissues that need to stay hydrated to maintain their shape.
3) How to prepare a microscope slide step by step?
The general process is:
- Clean the slide.
- Prepare the specimen (slice thinly if solid).
- Place the specimen in the center.
- Apply the medium (skip this for dry mounts; add a drop of water for wet mounts).
- Lower the coverslip at an angle to avoid air bubbles.
4) Can you reuse microscope slides?
Yes, glass microscope slides can be reused. If you prepared a dry mount, simply remove the tape/coverslip and wipe the slide clean with alcohol. If you used a wet mount or stain, the slide must be washed with soap and warm water, rinsed in distilled water, and dried with a lint-free cloth before reusing.
Conclusion
The dry mount is the foundation of slide preparation and an essential skill for any microscopist. While it lacks the high-resolution clarity of liquid-based methods, it is the only correct choice for moisture-sensitive, inorganic, or naturally opaque specimens.
By following a strict protocol-ensuring the microscope slide is perfectly clean, the specimen is adequately thin, and the coverslip is secure-students and hobbyists can reveal intricate details of the microscopic world that would otherwise be lost in a wet preparation. Always assess the nature of your sample first: if it is dry and dead, keep it dry; if it needs hydration, switch to a wet mount.